

Wednesday, April 24, 2013
Photo Challenge Time
This weeks photo challenge theme is Something Old, so since I just finished a round of "old fashioned" canning I chose my marmalade as my subject :)
 I love these jars especially, Hubby's mom found them in her garage. I love the detail in the designs! Any jars I buy nowadays are just plain, but these are sooo pretty! I may have to start a hunt for old canning jars :)
Tuesday, April 23, 2013
Sugar Free Mandarin Marmalade
Have you ever found such an amazing deal on something that it changed your weekend plans?! Well I found such a deal on mandarin oranges! So I decided to spend the majority of the weekend making marmalade :)


Yes I bought alot! (but marmalade makes a great Christmas present!)
I'm going to give you my recipe to make 4 pints, I doubled the recipe so I could make 8 pints at a time. Then, I made several batches of that :)
Start with 4 cups of mandarin segments, which is about 16 mandarins. And 1 1/2 cups lemon segments or about 3 lemons. Wash all the fruit, because some of that peel is going in the marmalade.

Put an extra large pot of water on high & bring it to just before a boil. Submerge your jars & lids in the water to sanitize & get hot to soften the glue on the lids.

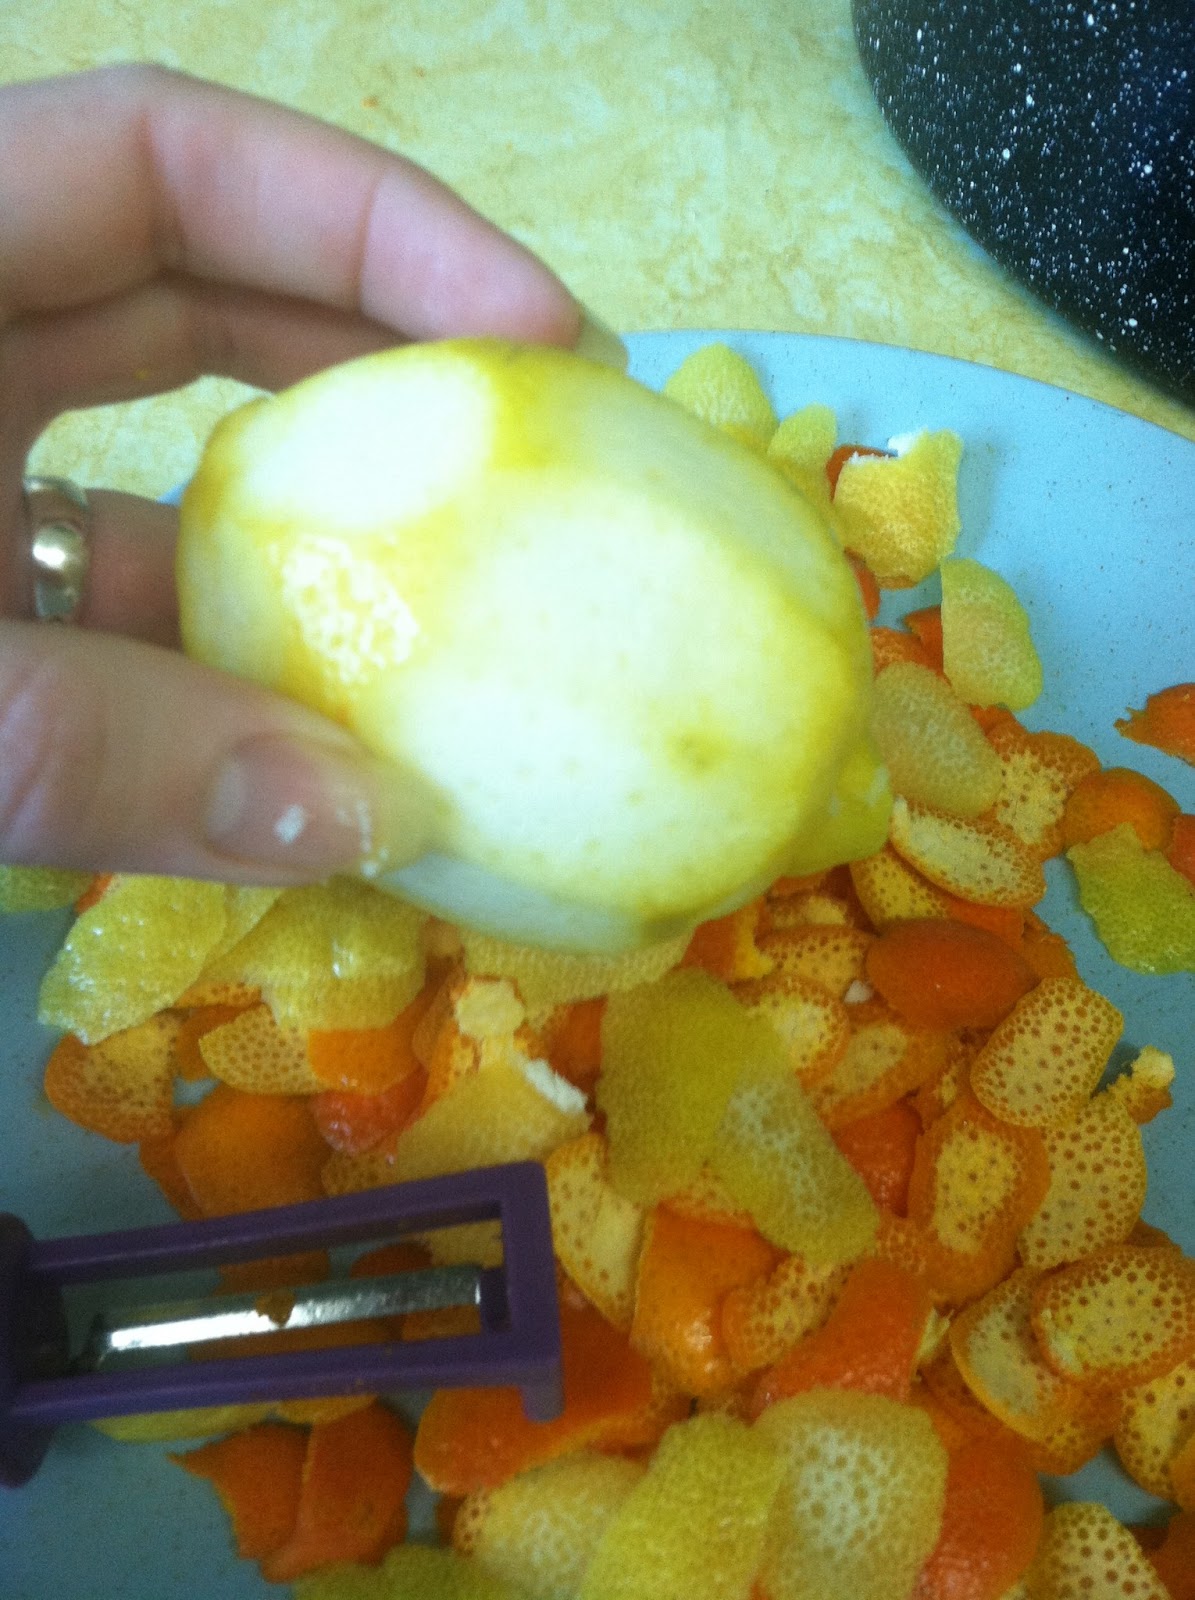
Then, using a potato peeler, peel off the orange part of the skin, trying to not get as much of the white underneath as possible. The white can be bitter & spongy, so not something you want in your marmalade. After you have finished peeling off the outer layer, peel the white off & throw it away.
You will do the same with the lemons. Make sure you breathe really deep while peeling the lemon, isn't that the greatest smell?! Makes me think of lemon meringue pie!

Then segment the orange, cut off the white in the middle, & cut the segment in half.

Continue until you have 4 cups of orange segments (in my first batch I did not cut the segments in half, but decided during cooking that it would help them break down into the marmalade better, so you are welcome to learn from my experience :).

Do the same with the lemon slices, making sure to get out any seeds. I found very few seeds in the mandarins, but the lemons made up for it!
Now you will want to start your canner heating up so it's at a nice boil when you need it. I had to take my jars off the stove to do this. If you have a big enough stove to have the jars & the canner on it while also cooking the marmalade, then more power to you (& can I come use your kitchen next time I'm canning?!)

Put the peels in a large pot with 2 cup water & 1/8 tsp baking soda & bring to a boil. Once they are boiling turn it down to simmer & cover with a lid for 20 minutes.

While the peels are simmering, stir together 1/2 cup splenda & 4 Tbsp Ball Real Fruit No Sugar Pectin in a large bowl (if you are using the boxed pectin, you will need to use 1 1/3 boxes, the Ball pectin requires less than the boxed pectin). At this point you can add some spice if you would like. Consider 1/2 Tbsp cinnamon, or ginger, or clove. Our favorite was adding both cinnamon & clove to a batch :)

Then stir the fruit into the Splenda- Pectin mixture. Let sit until peels have finished simmering.

Add the fruit to the peels & add 2 cups water. Bring to a boil, then bring down to a simmer, put a lid on it & let simmer for 10 minutes.
Once it is done simmering, add 3 1/2 cups splenda & stir together well & bring back to a rolling boil. Let it boil for one minute, while stirring.

Now it's time to put the marmalade in the jars! I highly recommend Ball's funnel, it has a large mouth to catch drips, which is great if you aren't so neat in the kitchen :)
Fill the jars to where the neck starts, or to 1/4 inch from the top.
Put the lids & rings on them & put them in the boiling water canner for 15 minutes.

After 15 minutes take them out of the water canner & let sit to seal & cool overnight. I also highly recommend these special can tongs made by Ball, they hold the can securely, which is important when dealing with boiling hot breakable jars! As they cool, they will "pop" when they seal. I see this as them telling me good job on the canning ;) Any that do not seal (the top still clicks when pressed on) can be put in the fridge & eaten first.
Now you have mandarin marmalade to enjoy! I see a marmalade covered pork tenderloin in my future! Below is the printable recipe.
Sugar Free Mandarin Marmalade
Makes 4 pints
about 16 mandarin oranges (4 cups once segmented)
3 lemons (1 1/2 cups once segmented)
1/8 tsp Baking Soda
4 cups water
4 cups Splenda
4 Tbsp Ball Real Fruit No Sugar Pectin
1/2 Tbsp ground cinnamon or ground ginger or ground clove (optional)
4 pint canning jars with lids & rings
Wash all the fruit, because some of that peel is going in the marmalade.
Put an extra large pot of water on high & bring it to just before a boil. Submerge your jars & lids in the water to sanitize & get hot to soften the glue on the lids.
Then, using a potato peeler, peel off the orange part of the skin, trying to not get as much of the white underneath as possible. The white can be bitter & spongy, so not something you want in your marmalade. After you have finished peeling off the outer layer, peel the white off & throw it away. You will do the same with the lemons. Then segment the orange, cut off the white in the middle, & cut the segment in half. Continue until you have 4 cups of orange segments. Do the same with the lemon slices, making sure to get out any seeds.
Now you will want to start your canner heating up so it's at a nice boil when you need it. I had to take my jars off the stove to do this.
Put the peels in a large pot with 2 cup water & 1/8 tsp baking soda & bring to a boil. Once they are boiling turn it down to simmer & cover with a lid for 20 minutes.
While the peels are simmering, stir together 1/2 cup splenda & 4 Tbsp Ball Real Fruit No Sugar Pectin in a large bowl (if you are using the boxed pectin, you will need to use 1 1/3 boxes, the Ball pectin requires less than the boxed pectin). At this point you can add some spice if you would like. Consider 1/2 Tbsp cinnamon, or ginger, or clove. Then stir the fruit into the Splenda- Pectin mixture. Let sit until peels have finished simmering.
Add the fruit to the peels & add 2 cups water. Bring to a boil, then bring down to a simmer, put a lid on it & let simmer for 10 minutes.
Once it is done simmering, add 3 1/2 cups splenda & stir together well & bring back to a rolling boil. Let it boil for one minute, while stirring.
Now it's time to put the marmalade in the jars! Fill the jars to where the neck starts, or to 1/4 inch from the top. Put the lids & rings on them & put them in the boiling water canner for 15 minutes.
After 15 minutes take them out of the water canner & let sit to seal & cool overnight. As they cool, they will "pop" when they seal. Any that do not seal (the top still clicks when pressed on) can be put in the fridge & eaten first. Enjoy!
Thursday, April 18, 2013
My Niecephew
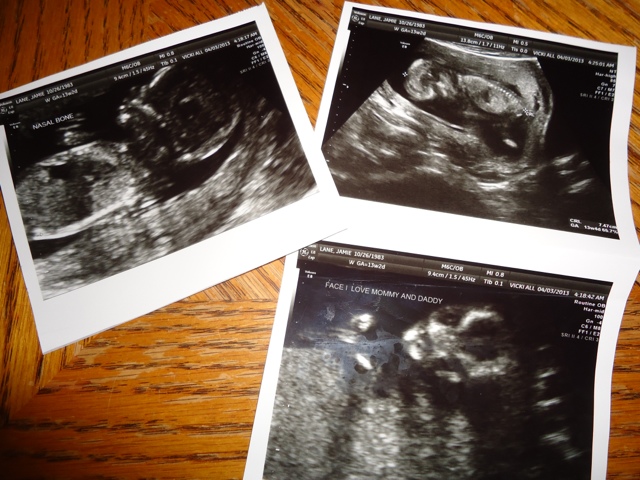
My sister had sonogram pics taken of my niecephew (which is what I will be calling the baby til we know if it's a niece or nephew) And I can already tell that my niecephew is adorable!!! :) I can't wait til I can really see the baby face to face!
This weeks theme for the photo challenge is sweet, so I took a pic of the sonograms cuz that's the sweetest thing I could think of!
This weeks theme for the photo challenge is sweet, so I took a pic of the sonograms cuz that's the sweetest thing I could think of!
Pray for West
There has been so much tragedy on the news, Boston & now West, TX added to all the usual mayhem going on. I usually stay away from writing about these things, not because I don't care, but because that's not why I started this Blog. However, the more I heard about the explosion in West the more I felt compelled to call out for prayer.
West, TX means alot to our family. Both Hubby & I spent our childhoods stopping there, for him it was to & from his grandparents house & for me my great-grandparents. We were stopping, of course, for their amazing kolaches! I'm sure we saw each other there and didn't even know it!
Then we spent the first night of our Honeymoon in West on our way to San Antonio. So West, TX will always have a special place in our hearts!
They are in a lot of pain right now as the deal with the effects of this fertilizer plant explosion. I'm just asking for prayer. Prayer for healing, for a quick rebuilding, & for comfort.
Thank you!
Tuesday, April 16, 2013
Spice Rubbed Chicken Fingers with Cilantro Dipping Sauce
Last night for dinner I made my take on the South Beach Diet Spice Rubbed Chicken Fingers with Cilantro Dipping Sauce. You can find their exact recipe in The South Beach Diet Cookbook on page 212. Hubby & I like lots of seasonings so this was my way of making it :)
 These can be grilled, I would typically use my George Foreman to cook them, or as I did this time, you can put them under the broiler. So preheat your preferred method of cooking :) I had 3 chicken breasts, so I cut them into tenders (I'm not a butcher, please excuse the lack of uniformity), then I seasoned both sides with garlic powder, ground cumin, Cajun seasoning, chili powder, and garlic salt. I let them sit soaking up the seasonings while I made the sauce.
 Into the Magic Bullet (or food processor or blender, whatever you have to work with) I put 1/2 cup fresh parsley, 1/2 cup fresh cilantro, 1/4 cup slivered almonds, 1 serrano pepper seeded, and several sprinklings of salt. I pulsed this until everything was chopped. Then I added 2 Tbsp lime juice & 2 Tbsp canola oil (I would typically use olive oil, but it is on the grocery list). Pulse several more times. Then I scooped it all into a bowl & stirred in 2 Tbsp water. Put the sauce in the fridge to meld.
Then I put the tenders under the broiler for 20 minutes, turning every 5 minutes, or until the thickest piece can be cut & is white all the way through.
 Serve with the sauce on the side. We had ours with a side of broccoli for a very yummy Phase 1 dinner. This recipe as I made it will feed 3 people, which means I got to have it again for lunch today :)
Let me know if you try this recipe out & what you think! We really enjoyed it!


Then I put the tenders under the broiler for 20 minutes, turning every 5 minutes, or until the thickest piece can be cut & is white all the way through.

Let me know if you try this recipe out & what you think! We really enjoyed it!
Monday, April 15, 2013
We are South Beach Dieters
Have you ever said you were going to do something... more than once... and never really get around to doing it? Then, feel like if you tell people again, they really aren't going to believe you... Please tell me I'm not the only one!
.JPG)


So remember way back when I told you we were going to start a diet "soon". Then a little while later I said it again... And yet again at the beginning of 2012!
Well, believe it or not Hubby & I have actually started our diet!
.JPG)
We are doing the South Beach Diet, because as I have said before, I appreciate that it teaches healthy eating habits for life instead of crash dieting. We really enjoy the recipes South Beach offers, and & really enjoy cooking! So win win :) The hardest part for us is the first 2 weeks because there is a very limited diet in order to cleanse your body, but after those 2 weeks it gets much easier & less limiting.
This will take planning on my part since I'm pretty much the one in charge of what we eat, but as long as I stick to my weekly menu planning we should be good to go!
We officially started on Thursday, and Saturday morning I weighed myself, which I really don't recommend doing! Please don't be like me, weighing yourself to often can be very discouraging. But I had already lost a pound! So at least I wasn't discouraged! I will try from now on not to weigh myself more than once a week :) Of course Hubby weighed himself Sunday morning & he had already lost 6 lbs! Men can be frustrating at times ;) I threatened to start spiking his food with sugar! But in all honesty I'm very proud of him!

Here is our before pic (do you love Arrested Development as much as we do?!)

And a better/worse one, depending how you look at it.
I hope to share some of our favorite SBD recipes with you as we go, if I can remember to take pics while cooking. That is my biggest deterrent from posting more recipes! Have you ever tried SBD? What was your experience like? We can use all the tips, tricks, encouragement, & prayer we can get!
Wednesday, April 10, 2013
Lines
This weeks theme for the photo challenge is Lines.
I took this pic in our beautiful shower of the glass tiles :)
If you haven't seen the pics of the shower, it is beautiful! You should check it out: http://just-me-writing-to-you.blogspot.com/2012/07/living-in-our-home.html?m=1
Now that you have seen the bathroom, let me take a poll... What color should we paint the walls? Originally I was thinking gray to keep it a completely black & white bathroom, but now we are discussing the possibility of color... What do you think?
Saturday, April 6, 2013
New Roof
Yesterday we got a pretty new roof :) About a week after we got the keys (and had our roof repaired for a leak that was in the water heater/ac closet) We had a huge hail storm : / So we finally called the insurance & got a new roof!

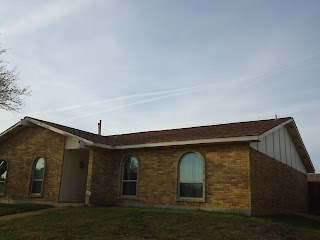


Here is a pic of the old roof

and the new roof!

We up graded to architectural shingles instead of the 3-tab that were originally there. They are supposed to stand up better to high winds :)

We also had them add a roof vent to keep the attic cooler which will save on the AC bill :)
Our home is coming together a little at a time. It's very exciting to see things being marked off the ever growing list ;)
Friday, April 5, 2013
Aunt Krystle
Jamie & Craig are having a baby! Right now in Jamie's tummy is my 13 week niece or nephew!!!
 This baby won't be spoiled at all ;)
This week's theme for the Photo Challenge is Blessings. I took the above pic for this week because this baby is such a blessing! I can't wait to meet the little thing!
I've never been an Aunt before! I think I'll be pretty good at it ;)
I know Craig & Jamie will be great parents! :) I'm very excited about the beginning of their little family!
So all you Aunt's out there, what are some Auntie things I need to know? I gotta get prepared! :)
Subscribe to:
Posts (Atom)